Side Dishes
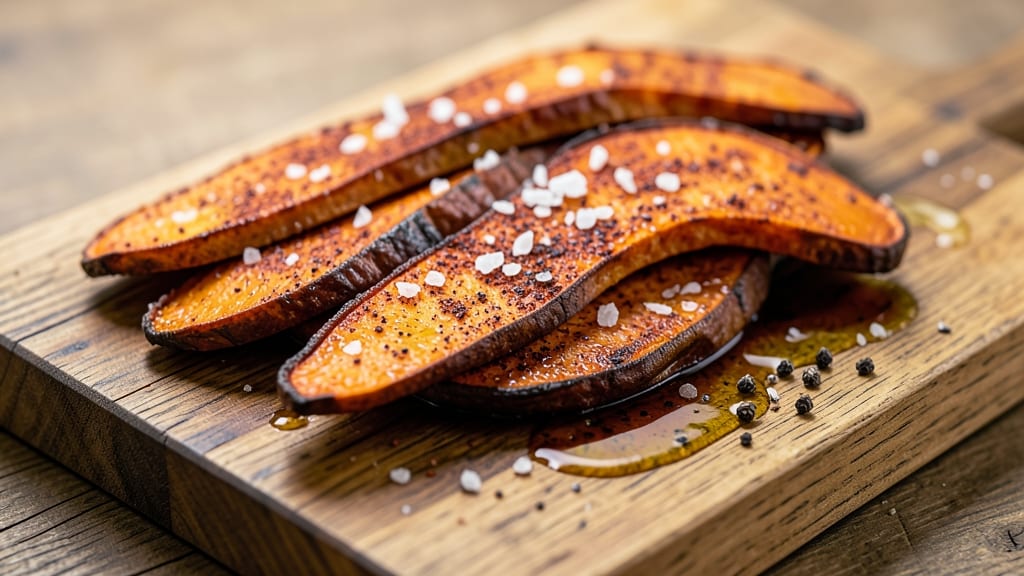
Sweet potato planks transform ordinary sides into restaurant-worthy dishes with their caramelized edges and tender centers. This technique—slicing sweet potatoes into thick planks and roasting them until golden—creates a visually stunning presentation that’s as impressive as it is delicious.
The key lies in proper slicing and high-heat roasting, which develops deep, smoky-sweet flavors without drying them out.
The beauty of sweet potato planks is their versatility. They work as a standalone side dish, pair perfectly with grilled meats, or even star in salads for added texture.
Seasoning with olive oil, salt, and smoked paprika enhances their natural sweetness, while a final sprinkle of flaky sea salt adds a sophisticated finish. This method is foolproof—no special tools required, just a baking sheet and a little patience.
What makes this recipe special is the contrast of textures: crispy, charred edges give way to a creamy, buttery interior that melts in your mouth. The aroma alone—warm, earthy, and slightly caramelized—will have everyone at the table asking for seconds.
Whether you're hosting a dinner party or simply elevating a weeknight meal, these planks deliver restaurant-quality results with minimal effort.
Serve them warm alongside roasted chicken, blackened fish, or even as a hearty vegetarian main. For extra flair, drizzle with a balsamic glaze or serve with a cooling yogurt dip. This recipe proves that sides can be just as impressive as the main course—with the right technique, of course.
Ingredients for sweet potato planks
Thick-cut sweet potatoes, aromatic spices, and precise roasting create restaurant-worthy planks with perfect caramelized edges.
| Ingredient | Amount | Notes |
|---|---|---|
| Large Sweet Potatoes 🍠 | 2 whole | Organic preferred, uniform size |
| Extra-Virgin Olive Oil 🫒 | ¼ cup | High-quality, fruity variety |
| Smoked Paprika 🌶️ | 1 tbsp | For authentic smoky depth |
| Diamond Crystal Kosher Salt 🧂 | 1 ½ tsp | Fine grain for even seasoning |
| Freshly Ground Black Pepper 🌶️ | ½ tsp | Freshly cracked for brightness |
| Flaky Sea Salt 🧂 | 1 tbsp | For final sophisticated finish |
| Balsamic Glaze 🍷 | ⅛ cup | Optional for elegant drizzle |
| Plain Greek Yogurt 🥛 | ¼ cup | For cooling dip option |
| Fresh Thyme Leaves 🌿 | ¼ tsp | Optional herb garnish |
| Garlic Cloves 🧄 | 2 cloves | Minced for yogurt dip |
| Lemon Zest 🍋 | 1 tsp | For yogurt dip brightness |
The sweet potatoes are the foundation—look for uniform, organic varieties at specialty markets or the produce section of Whole Foods. Their natural sweetness develops beautifully when roasted whole, so avoid any with soft spots or bruises. For extra insurance, peel them lightly with a vegetable peeler to remove the toughest skin while keeping the natural sweetness intact. The smoked paprika is crucial for that authentic charred flavor; Penzeys or McCormick brands deliver consistent quality. If you're feeling adventurous, try a blend of smoked and sweet paprika for depth.
No smoked paprika? Substitute with a pinch of liquid smoke (start with 1/4 tsp) or extra black pepper for heat. For the olive oil, California avocado oil works beautifully too—it has a higher smoke point for those charred edges. The flaky sea salt is non-negotiable for the final finish; Maldon or Jacobsen are the gold standards. For the yogurt dip, any plain Greek yogurt works, but full-fat gives the richest texture. If you're serving these as a vegetarian main, consider adding toasted walnuts or crumbled feta to the yogurt for extra protein. The balsamic glaze can be store-bought or homemade—simply reduce balsamic vinegar by half for a quick version.
Sweet potatoes keep well in a cool, dark place for up to 2 weeks, but roast them within 3-4 days of purchase for peak flavor. Once roasted, store the planks in an airtight container for 3-4 days—they reheat beautifully in a 350°F oven for 10 minutes to restore crispiness. For the yogurt dip, store it separately in the fridge and stir in the garlic and lemon zest just before serving. These planks make excellent prep-ahead sides—roast a batch on Sunday and serve throughout the week. Freeze any extras for up to 3 months by wrapping tightly in plastic wrap.
Why You'll Love This Recipe
- One-Pan Magic: Honestly, I swear by this recipe when I’m too tired to wash dishes. Just slice those sweet potatoes into planks, toss them in olive oil, smoked paprika, salt, and pepper, and pop them in the oven—no cutting boards, no mess, just crispy edges and tender centers waiting for you.
- Smoky-Sweet Bliss: That smoked paprika? It’s the secret weapon here. The first bite gives you this deep, earthy warmth that pairs perfectly with the natural sweetness of the sweet potato. I’ll be real: my kids ask for seconds before I even finish serving.
- Meal Prep Hero: Between us, this is my go-to for busy mornings. Roast a big batch on Sunday, store them in the fridge, and reheat slices straight from the pan—perfect for breakfast burritos, salads, or just snacking. (Yes, even on a Tuesday night.)
- Budget-Friendly Staple: Sweet potatoes are cheap, and this recipe stretches them far. A single large one feeds two, and the spices cost pennies. Plus, the leftovers? They’re just as good cold the next day—ideal for lunches or quick dinners when you’re not feeling fancy.
Step-by-step instructions for sweet potato planks
Master the art of transforming humble sweet potatoes into restaurant-worthy planks with perfectly charred edges and caramelized interiors.
Prepare and Season the Sweet Potatoes
Begin by preheating your oven to 425°F with the rack positioned in the middle position. Using a sharp chef's knife, carefully slice each of the 2 whole large sweet potatoes lengthwise into ½-inch thick planks. I like to work on a damp cutting board to prevent sticking and ensure clean cuts.
Place the sweet potato planks on a clean kitchen towel and pat them dry completely. This step is crucial for achieving crispy edges. In a small bowl, whisk together the 0.25 cup extra-virgin olive oil, 1 tablespoon smoked paprika, 1.5 teaspoons diamond crystal kosher salt, and 0.5 teaspoon freshly ground black pepper until well combined. Brush this mixture generously over both sides of each sweet potato plank, making sure to get into all the crevices.
Roast Until Caramelized
Arrange the seasoned sweet potato planks on a rimmed baking sheet lined with parchment paper, leaving about ½ inch of space between each plank. This spacing allows for proper air circulation and even browning. Place the baking sheet in the preheated oven and roast for 20 minutes, then carefully flip each plank using tongs.
Return the planks to the oven and continue roasting for another 15-20 minutes until the edges are deep golden brown and the interiors yield slightly when pierced with a sharp knife. The planks should be tender with caramelized edges that have a slight crackling texture. Rotate the baking sheet halfway through cooking if your oven has hot spots to ensure even browning.
Finish with Flaky Sea Salt and Optional Garnishes
Remove the sweet potato planks from the oven and let them rest for 5 minutes on the baking sheet. This resting period allows the juices to redistribute, ensuring each bite is moist and flavorful. While they're resting, sprinkle each plank generously with 1 tablespoon flaky sea salt, focusing on the edges where the caramelization is most pronounced.
For serving, you have several elegant options. Drizzle each plank with 0.125 cup balsamic glaze for a sophisticated touch, or serve with a side of the yogurt dip made by combining the 0.25 cup plain Greek yogurt, minced 2 garlic cloves, 1 teaspoon lemon zest, and 0.25 teaspoon fresh thyme leaves. This dip adds a cooling contrast to the warm, caramelized sweet potatoes.
Serve Immediately for Optimal Texture
Transfer the sweet potato planks to a serving platter and cut each plank into 1-inch wide slices if desired. The planks should be tender enough to slice easily with a sharp knife, yet maintain their structural integrity. Serve immediately while they're still warm and the caramelized edges are at their peak texture.
Each plank should deliver a perfect balance of textures: crispy edges that crackle with each bite, tender interiors that melt in your mouth, and a deep, caramelized sweetness that's enhanced by the smoky paprika and flaky sea salt. The contrast of the cool yogurt dip against the warm sweet potatoes makes this dish truly exceptional.
Pro Tips For Making Sweet Potato Planks
- USE A KNIFE, NOT YOUR HANDS: Sweet potatoes are tougher than they look—trying to slice them raw with a butter knife is how you end up with bruised fingers and uneven planks. Cut them lengthwise first to create flat sides, then slice into ½-inch thick planks while they’re still firm. (Yes, even if you’re impatient like me.)
- SALT THEM BEFORE TOASTING: I used to skip this step, thinking the salt would just dissolve into the oil. Wrong. Sprinkle the planks with salt before roasting—it crisps up beautifully and seasons the edges where they’ll get caramelized. About ½ teaspoon per plank, rubbed in lightly.
- ROAST AT 425°F UNTIL FORK-TENDER: Low and slow is tempting, but these planks need high heat to develop that smoky crust. Start them at 425°F for 20 minutes, then flip and check for doneness with a fork—it should slide in easily but still resist slightly. Overcooking turns them dry; undercooking leaves them gummy.
- UPGRADE WITH A DRIZZLE OF OIL: Don’t just toss them in oil like fries. Brush the planks with extra-virgin olive oil after seasoning—it clings better and keeps them moist longer. A light coat is enough; you’re not deep-frying them. (And yes, the difference is noticeable.)
Essential equipment for perfect results
Rimmed Baking Sheet
This is your most essential tool for even cooking and easy cleanup. I recommend a half-sheet pan (18x13 inches) made from heavy-gauge aluminum—like the Chicago Metallic Commercial Half Sheet Pan—which distributes heat evenly and withstands high temperatures.
Avoid flimsy pans that warp or create hot spots. For extra crispiness, place the pan on the middle rack where heat is most consistent. 🔥
Parchment Paper
Line your baking sheet with unbleached parchment paper to prevent sticking and make cleanup effortless. I prefer Reynolds Kitchens Parchment Paper because it handles high heat without burning. Cut it to fit snugly, leaving a slight overhang on the sides for easy removal.
This also allows you to slide the planks onto a serving platter without transferring them directly.
Sharp Chef’s Knife
A high-quality 8-inch chef’s knife (like the Wüsthof Ikon or Mac Knife Professional) is crucial for clean, even slices. Dull knives crush sweet potatoes, leading to uneven cooking. For extra control, use a damp cutting board—it prevents slipping and ensures straight cuts.
A mandoline (with a ½-inch thick blade) can also work, but always use the safety guard to avoid accidents.
Tongs for Flipping
Invest in long-handled tongs (like OXO Good Grips) to safely flip the planks without crushing them. The long handles give better leverage, and the silicone tips protect the caramelized edges.
Avoid metal spatulas—they can tear the delicate sweet potato skin. Flip gently to maintain the planks’ structural integrity while promoting even browning on all sides.
Digital Meat Thermometer
For foolproof doneness, use a digital instant-read thermometer (I love the ThermoWorks Thermapen ONE). Insert it into the thickest part of a plank—it should read 205–210°F when the interior is tender but not mushy.
This prevents overcooking while ensuring perfect texture. A thermometer is especially helpful if you’re new to roasting sweet potatoes or have an oven with inconsistent heat zones.
Optional: Air Fryer
If you prefer a quicker method, an air fryer (like the Ninja Foodi 5.5-Quart) can achieve similar results in 15–20 minutes at 400°F. Arrange the planks in a single layer, spray lightly with olive oil, and shake the basket every 5 minutes for even browning.
The air fryer’s circulating heat creates crispy edges without needing to flip, though you’ll still want to finish with flaky sea salt for that restaurant touch. ✨
Nutrition facts
Frequently asked questions
Can I use regular potatoes instead of sweet potatoes for planks?
Regular potatoes won't work as well—sweet potatoes have the perfect balance of moisture and natural sweetness that caramelizes beautifully. Their lower starch content also prevents them from falling apart during roasting. If you're set on white potatoes, try slicing them thinner (¼-inch) and roasting at 400°F for 15 minutes total, but expect less sweetness and more mealy texture.
How do I fix sweet potato planks that turn out mushy instead of crispy?
Mushy planks usually mean overcooking or too-thick slices. For crispy edges, slice them no thicker than ½-inch and roast at 425°F. Pat them completely dry before seasoning, and leave ½-inch space between planks on the baking sheet. If they still turn out soft, reduce oven time by 5 minutes and check doneness with a fork—it should pierce easily but not fall apart.
Can I make sweet potato planks ahead of time?
Yes! Roast them up to 2 days in advance and store in an airtight container. Reheat at 350°F for 10 minutes to restore crispiness. For best texture, serve them warm rather than cold. If reheating from frozen, increase time to 15 minutes—they'll be softer but still delicious. The flavor actually improves overnight as the caramelization deepens.
What are the best ways to serve sweet potato planks?
These versatile planks shine as a side with grilled meats, but they're also perfect as a main! Try serving them with a cooling yogurt dip, drizzled with balsamic glaze, or stacked with avocado and sprouts for a veggie bowl. For a hearty meal, pair with black beans, corn, and lime crema. They also work beautifully in grain bowls or as a base for Buddha bowls with quinoa and roasted veggies.
Why do my sweet potato planks stick to the baking sheet?
Sticking happens when moisture escapes and cooks onto the pan. Always use parchment paper and ensure your baking sheet is well-oiled or lined properly. If they still stick, your oven might be too hot—reduce temperature to 400°F and increase cooking time slightly. For extra insurance, lightly oil the parchment paper before placing the planks on it. Avoid non-stick sheets at high heat—they can warp and fail.