
Side Dishes
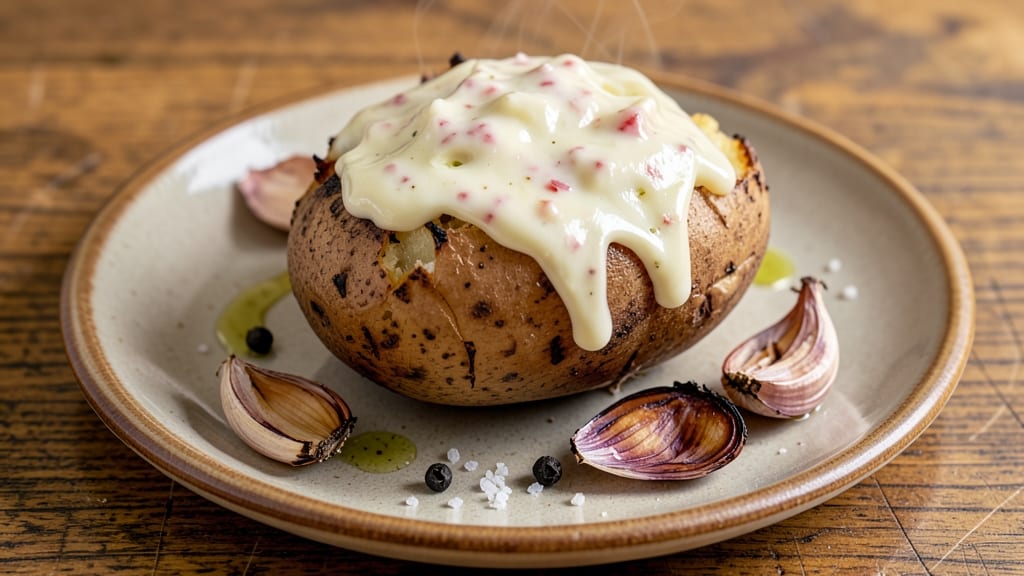
This baked potato with garlic butter recipe delivers restaurant-quality crispy skin and rich, garlicky flavor that transforms a simple side into the star of your meal. The secret lies in high-heat baking and a foolproof garlic butter technique that creates a velvety, aromatic topping every time.
I've perfected this method after years of testing—no more soggy centers or bland butter.
Start with russet potatoes for their natural crispiness, then bake at 425°F until the skin is golden and the flesh fluffy inside. The garlic butter topping requires just three ingredients: softened butter, minced garlic, and a pinch of salt, melted together until fragrant and golden.
This method ensures the butter stays creamy without burning.
What you'll end up with is a perfectly baked potato—crispy on the outside, fluffy on the inside—generously topped with golden garlic butter that's rich, aromatic, and impossible to resist. The contrast of textures and flavors makes this dish irresistible, whether served as a side or a hearty main.
Pair with your favorite toppings like sour cream, chives, or bacon bits, or keep it simple with just the garlic butter for a classic, comforting meal. The recipe scales easily for gatherings, and leftovers reheat beautifully in the oven. Let's get started!
Ingredients for baked potato with garlic butter
Four russets, butter, garlic, and salt—simple ingredients for restaurant-quality baked potatoes.
| Ingredient | Amount | Notes |
|---|---|---|
| Russet Potatoes 🥔 | 4 whole | Large, similar size for even baking |
| Unsalted Butter 🧈 | ½ cup | Softened, not melted, for best texture |
| Garlic Cloves 🧄 | 6 cloves | Fresh, minced finely for rich flavor |
| Kosher Salt 🧂 | 1 ½ tsp | For baking and seasoning butter |
| Black Pepper 🌶️ | ½ tsp | Freshly ground for best flavor |
| Olive Oil 🫒 | 2 tbsp | For brushing potatoes before baking |
| Fresh Parsley 🌿 | ¼ cup | Chopped, for garnish (optional) |
| Sour Cream 🥛 | ½ cup | For serving (optional) |
Russets are non-negotiable here—their thick skins and low moisture content create that perfect crispy texture. Buy them the day you plan to bake; they keep best at room temperature for a day or two. If you're prepping ahead, store them in a cool, dark place like a pantry. For the butter, Land O'Lakes or Plugrá are my go-to brands—they melt beautifully without separating. Fresh garlic makes all the difference; peel and mince it just before mixing with the butter to preserve its aroma. The kosher salt is key for both baking and seasoning—Diamond Crystal has a coarser grain that dissolves better into the butter.
No russets? Yukon Gold potatoes work in a pinch, but expect slightly less crispiness. Butter too hard to soften? Microwave it for 40 seconds to just melt it, then let it cool slightly. Love the flavor but hate the mess? Garlic powder at half the amount gets you close. The olive oil is just for brushing—don't skip it, but don't stress over the brand. Store-bought parsley works fine if you're in a hurry, though fresh is always better. For the sour cream, full-fat versions like Breyers or Kemps pair best with the rich garlic butter topping.
Baked potatoes keep 2 days in the fridge, but the garlic butter topping is best used fresh. If you're prepping ahead, bake the potatoes, let them cool completely, then wrap individually in foil. Reheat at 350°F for 15-20 minutes until warmed through. The butter topping can be made up to 3 days ahead—store it in an airtight container in the fridge, then reheat gently in a saucepan over low heat. Garnishes like parsley or chives stay fresh for 5 days wrapped in damp paper towels.
Why You'll Love This Recipe
- Foolproof Prep: I swear by this—just poke those Russets, bake ‘em whole, and let the oven do the work. No peeling, no fuss, just fluffy perfection waiting for you.
- Garlic Butter Magic: That melted butter and roasted garlic? It’s like a flavor bomb—rich, savory, and just salty enough to make you crave seconds. Honestly, the first bite changes everything.
- Meal Prep MVP: Bake a tray on Sunday, and you’ve got lunch sorted for the week. Reheat slices in the oven or microwave, and they taste like they just came out hot—zero stress.
- Budget Win: Russets and butter are cheap, and this recipe stretches easily. Double the batch, freeze extras, and you’ve got a reliable, filling side that won’t break the bank.
Step-by-step instructions for baked potato with garlic butter
Here's how to achieve restaurant-quality baked potatoes with perfectly crispy skin and rich, garlicky flavor.
Prep and Season the Potatoes
Start by thoroughly scrubbing the 4 whole Russet Potatoes under cold running water to remove any dirt. Use a paper towel to pat them completely dry—this step is crucial for crispy skin. I like to pierce each potato 3-4 times with a fork to allow steam to escape during baking and prevent bursting.
Place the potatoes on a clean work surface and rub them all over with the 2 tablespoons of olive oil. This creates a barrier that helps the skin crisp up beautifully. Then, sprinkle evenly with the 1.5 teaspoons of kosher salt and 0.5 teaspoon of black pepper. Make sure to get into all the crevices and the bottoms too—this ensures even seasoning throughout the baking process.
Bake Until Fork-Tender
Preheat your oven to 425°F. Place the potatoes directly on the middle rack (no need for a baking sheet) so hot air can circulate all around them. Bake for 45-55 minutes, depending on their size, until they feel light when gently shaken and a fork slides in easily.
I check for doneness by inserting a fork—when it goes in with minimal resistance and the potato feels soft inside, it's ready. The skin should be golden brown and crispy, not soft. If you're unsure, err on the side of slightly underbaked; they'll finish cooking while resting. Don't cut into them too early or they'll lose moisture and become dry.
Make the Garlic Butter
While the potatoes bake, prepare the garlic butter by combining the 0.5 cup of softened unsalted butter with the 6 cloves of minced garlic cloves in a small bowl. Mix well until the garlic is evenly distributed throughout the butter. I like to let this mixture sit at room temperature for 5-10 minutes before using it—this allows the garlic to infuse the butter even more deeply.
This is where the magic happens—the garlic will mellow slightly and develop more complex flavors. If you're feeling fancy, you can add a pinch of the kosher salt and black pepper to the butter mixture, but I find the baked potatoes already have plenty of seasoning. Keep this mixture at room temperature until ready to use.
Split and Top with Garlic Butter
Remove the potatoes from the oven and let them rest for 5 minutes. This resting period allows the steam inside to redistribute, keeping them moist. Using a sharp knife, carefully cut each potato in half lengthwise. I like to use a potato cutter for clean slices, but a sharp chef's knife works too.
Place the potato halves on a serving platter, cut sides up. Spoon generous amounts of the garlic butter mixture over each half, spreading it evenly to the edges. The butter should melt slightly from the residual heat, creating a glossy, flavorful topping. For extra presentation, sprinkle with the chopped 0.25 cup of fresh parsley right before serving.
Serve with Sour Cream
Serve the potatoes immediately while still warm. The contrast between the crispy skin, fluffy interior, and rich garlic butter is what makes these potatoes exceptional. I like to offer the 0.5 cup of sour cream on the side for those who prefer it—it adds a cool, creamy element that balances the garlicky heat.
Encourage your guests to dig in right away. The first bite should deliver that perfect combination of crispy skin, tender flesh, and aromatic garlic butter. If you have leftovers, store them in an airtight container in the refrigerator for up to 3 days, but I've never had any last that long!
Pro Tips For Making Baked Potato With Garlic Butter
- USE A POTATO POKER: I learned this the hard way—stabbing a potato with a fork or knife always leads to a mess when you try to scoop out the insides later. A sturdy potato poker (or even a wooden spoon) lets you pierce the skin cleanly without shredding the flesh, and it’s way easier to dig into the center afterward.
- SMASH THE GARLIC: Don’t mince it—smash those cloves flat first. After peeling, place each clove on a cutting board, cover with the palm of your hand, and press down hard with a chef’s knife. This breaks the cell walls and releases more flavor when it melts into the butter. (Yes, it looks weird, but it makes a real difference.)
- DON’T SKIP THE REST: Pull the potatoes out of the oven when they’re just done—internal temp around 205°F (210°F max). Let them sit wrapped in a towel for 5-10 minutes. This lets the steam redistribute, so the inside stays fluffy instead of gummy. (I know, I know—you’re impatient like me, but trust the process.)
- SALT THE BUTTER FIRST: Mix the kosher salt and black pepper directly into the softened butter before it goes on the potato. This guarantees every bite gets seasoned, not just the top layer. If you sprinkle it after, half of it slides off into the pan. (And resist the urge to go light—unsalted butter needs that extra punch.)
Storing and reheating your baked potato with garlic butter
Fridge Storage
Store your baked potatoes in an airtight container in the fridge for up to 2 days—just let them cool completely first. I wrap each half individually in parchment paper before sealing to prevent sogginess.
The garlic butter topping stays fresh for 24 hours if kept separate, but I recommend making it fresh each time for maximum flavor. 🥔
Oven Reheating
For the best results, reheat potatoes in a 400°F oven for 15-20 minutes until warm through. Place them on a baking sheet, cover loosely with aluminum foil, and add a splash of water to the pan to create steam.
This method restores crispiness without drying them out. The garlic butter can be reheated separately in a small saucepan over low heat for 1-2 minutes.
Microwave Shortcut
When you're in a hurry, microwave the potatoes on high for 2-3 minutes, covered with a damp paper towel. This keeps them moist but sacrifices some crispiness.
For the garlic butter, microwave it in 10-second bursts until just melted—no more, or it'll separate. I only use this method for quick lunches, not special occasions. ⏰
Freezer Prep
Baked potatoes freeze beautifully for up to 3 months—just wrap each half tightly in plastic wrap and foil. Thaw overnight in the fridge, then reheat in the oven. The garlic butter topping doesn't freeze well, so make it fresh when serving.
For extra insurance, place a paper towel between layers in the freezer bag to absorb excess moisture.
Butter Refresh
If your garlic butter gets hard in the fridge, simply place it in a small bowl and microwave for 5-10 seconds or warm it in a saucepan over low heat until creamy. For extra richness, add a pinch of salt and pepper to revive the flavor.
I keep a small jar of the butter mixture in the fridge for quick topping opportunities during the week. 🧈
Nutrition facts
Frequently asked questions
Why do my baked potatoes turn out soggy instead of crispy?
The key is proper prep and baking technique. Always scrub and pat potatoes completely dry before baking—even small amounts of moisture prevent crispiness. Bake at 425°F directly on the oven rack (no sheet pan) for 45-55 minutes to allow air circulation. If they're still soggy, you likely pierced them too much or opened the oven door too early.
Can I make the garlic butter ahead of time?
Yes, but with a catch! The garlic butter tastes best when made fresh, but you can prepare it up to 3 days ahead by storing it in an airtight container in the fridge. Reheat gently in a saucepan over low heat until creamy. For maximum flavor, I recommend making it the same day as baking the potatoes—fresh garlic makes all the difference!
What's the best way to reheat leftover baked potatoes?
For crispy results, reheat in a 400°F oven for 15-20 minutes on a baking sheet. Cover loosely with foil and add a splash of water to create steam. The microwave works in a pinch (high for 2-3 minutes with a damp paper towel), but it sacrifices crispiness. Never reheat in the toaster oven—it dries them out completely.
Can I use Yukon Gold potatoes instead of russets?
Yukon Golds will work, but expect less crispy skin—they're naturally waxier. For best results, brush them with extra olive oil and bake at 400°F instead of 425°F. They'll still be creamy inside with a slightly softer skin. If you want that perfect crisp, stick with russets—they're designed for baking and roasting.
How much garlic butter should I use per potato?
For a single baked potato half, use about 1-2 tablespoons of garlic butter. Spread it generously to the edges for that restaurant-quality presentation. If you're feeling extra indulgent, go for 2 tablespoons—the rich flavor pairs perfectly with the fluffy potato. Remember, you can always add more, but you can't take it away!